Make Your Own Sec Lab
DIY!
Imagine that you want to seriously understand how to exploit server’s weakness. You’d better to train on one of your server. Better you can do it using virtual machines: you will be able to replay attacks again and again whitout worrying about server’s damage. Virtual machines are usefull to host weak servers, but they are usefull too to host offensive OS such as Kali Linux for the most well known.
There’s a lot of tutorials explaining how to build a set of machines to test some offensive scenari, this one aims to explain how to:
- set a correct and usefull offensive OS in few commands
- have multiple ready to use weak servers
- play attacks between offensive OS and weak servers (with an internet connection or in an off line way)
Virtualization application
Here we have two (free) leaders: VirtualBox & VMware Workstation Player many of disribution we we’ll use are available in a ready to use way in one or other version. But some, as metasploitable, are WMPlayer only … So I would suggest to install both. We we’ll see how to get working all together anyway, and how to use some usefull network bridges automatically created by WMPlayer.
VirtualBox
I suggest you download last version for your OS from the official website.
For debian / Mint / Unbuntu you should install it with something like
sudo dpkg -i ~/Téléchargements/virtualbox-4.3_*.debTo avoid installation of guest OSs I recommend taking pre-installed VMs from OSboxes.
Kali
For Kali OSboxes provides Kali pre-installed VMs, but I recommand “Offensive Security”’s Kali VMs. Choose Kali version / vm can be a matter of taste: following commands are related to OSboxes Kali 1.1 32 VM installation and I will comment on benefits to follow the Offensive Security VMs way.
Be aware that you have access to WMware version too ;)
Unzip downloaded archive
7za e ~/Téléchargements/Kali_Linux_1.1.0-32bit.7z- Offensive Security VMs are packaged
- as a unique .ova file for Kali 2/0
- import file via Virtual Box, start your VM: you’re done
- as a set of vdmk files for Kali 1.1
- as a unique .ova file for Kali 2/0
- OSboxes Kali VMs vm are pacakaged
- as a unique vdi files for all Kali versions
Here we have vdi from OSboxes but you can follow next steps for the vdmk files from Offensive Security
Open Oracle VM Virtual Box

set a new VM as follow
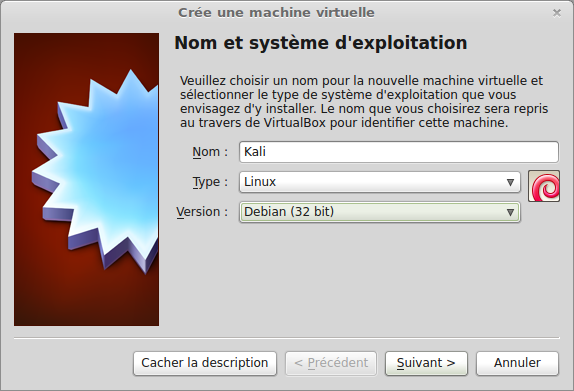
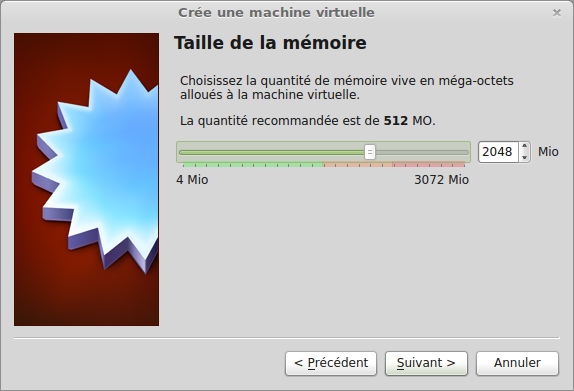
Allocate some RAM
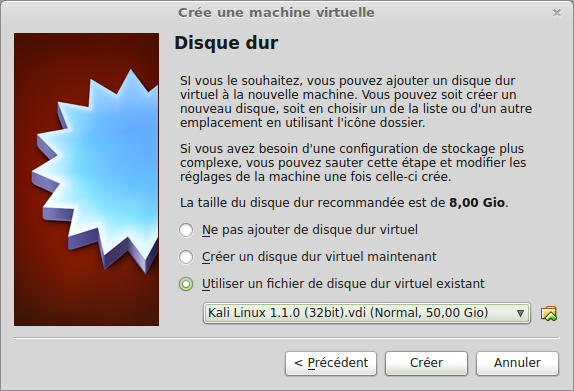
move downloaded preinstalled VM files (one vdi or multiple files) in Virtual Box Vms folder
#
mv ~/Téléchargements/32bit/Kali Linux 1.1.0 (32bit).vdi ~/VirtualBox VMs/Kali/
browse to moved vdi file (or first vdmk file) and create vm
Now start your new Kali VM.
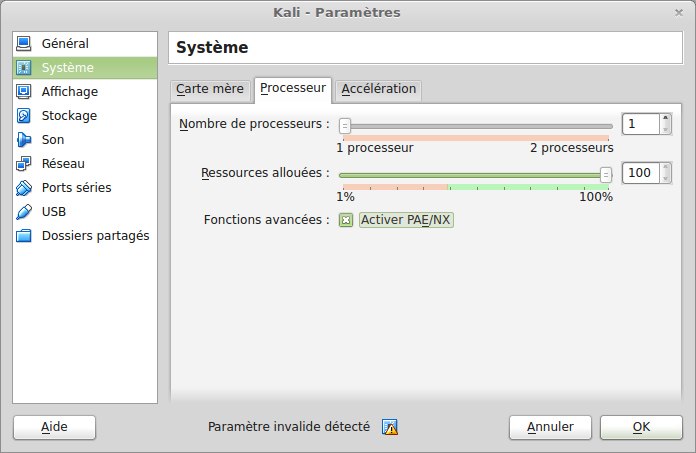
If start up fails with a Guru mediation (Ohh Amiga 500 I remember you) activate the “PAE” option in the “System” > “Processor” section of your VM
- username : root
- password : osboxes.org
- (be aware that you are in qwerty mode ;)
note that if you use Security Offensive WM you will login with
- username : root
- password : toor
3 usefull tweaks
choose your keyboard
“Applications” > “System Tools” > “Preferences” > “System” > “Region and Language” > “Layout tab”
- ”+” to add
- type “fran” to see french, select it, click add
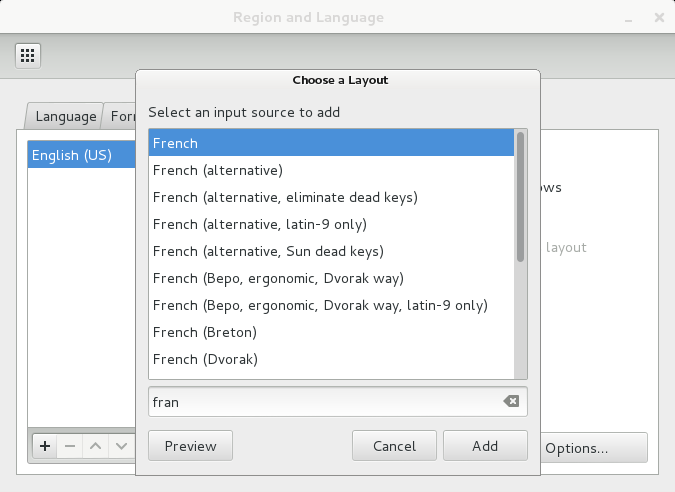
- now click a up to make french the default layout
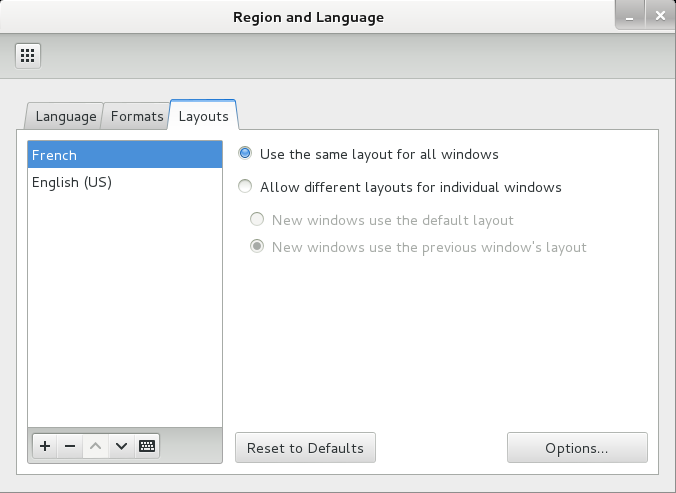
Now you can switch language a top right in task bar
Warning you will be in qwerty mode at startup and at login screen. If you want to change your default keyboard follow this link
change root password
passwdinstall Guest additions
features
- Better video support
- Shared clipboard
- Shared folder
- …
note that if you use Security Offensive VM you can directly install VirtualBox Guest Additions, your system is already ready
For OSboxes Kali VMs add to /etc/apt/sources.list
deb http://http.kali.org/kali kali-current main non-free contrib
deb-src http://http.kali.org/kali kali-current main non-free contrib
apt-get update
apt-get upgrade -y
apt-get dist-upgrade -y
reboot
apt-get install linux-headers-$(uname -r)mount VirtualBox Guest Additions drive from VirtualBox menu
cp /media/cdrom/VBoxLinuxAdditions.run /root/Desktop/
cd /root/Desktop/
chmod 755 VBoxLinuxAdditions.run
./VBoxLinuxAdditions.run
VMPlayer
N.B. if you are runnning a 32 bits system you will have to use 6.0 version but it works however
sudo chmod 755 VMware-Player-6.0.6-2700073.i386.bundle
sudo ./VMware-Player-6.0.6-2700073.i386.bundle
Let’s now download OWASP Broken Web Applications Project as example
- move unzip file in ~/.vmware/OWASP_BWA
- “File” > “Open a virtual Machine” and browse to .vmx file
Finally configure network
NAT is a cool solution if you use your personal LAN but if you are in more secured environment with DHCP bail, it may be usefull to not have to register all virtual MAC Address with a local IP, <troll>especially if ur network admin is an asshole</troll>
Host-Only networking can be usefull to create a private local network, but the main problem with this solution is that your vm will not have access to the Internet …
Installing both VMPlayer create two virtual usefull network vmnet1 and vmnet8 in network Section of your vm > “select Bridged mode” > and “vmnet8”

launch your Kali via VirtualBox and Your OWASP BWA via VMPlayer
What about weak servers
You can install this ubuntu server to have a heartbleed vulnerable nginx
Or this old wheezy to play with this local root exploit
You can install some vulnerable apps to play with
Enjoy your SecLab
You can now ping each other vm and each vm can access the Internet
You can now start by mapping your network from Kali by a nice
nmap -sV -O -PN 172.16.76.0/24- -sV detects service versions
- -O detects OS versions
- -PN tells it not to PING first, just check for the open ports
Marvelous isn’t it?
EDIT 2016-01-19
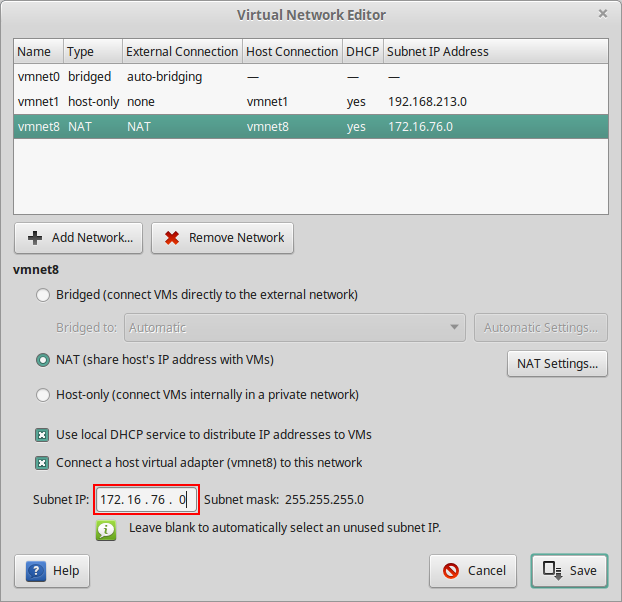
After trying to move my VMs on another machine, I discover that vmware don’t setup the same subnet for “vmnet8” at each install. So if you have some exported VMs (as ova file for example) with some hardcoded IP (in /etc/network/interface, /etc/hosts or any other files where IP is used) you have to setup the used subnet for “vmnet8” bridge access. You can do it by executing
sudo /usr/lib/vmware/bin/vmware-netcfgand check the field “Subnet IP:” is the one you use in your ova files
EDIT 2016-01-22
if you use windows vmware-netcfg is missing. Fortunaltely there’s a post explaining How to Use the Missing Virtual Network Editor in VMware Player in a nutshell:
- open a ommand prompt as Adminitrator
- right-click on the command prompt icon in the Windows start menu and select Run As Administrator from the available options
- type
rundll32.exe vmnetui.dll VMNetUI_ShowStandaloneblog comments powered by Disqus
